PROCESS A TRANSACTION
Follow the steps below to process a transaction through the RICS POS.
TICKET HEADER TAB

1. Use the Cashier dropdown menu to select a cashier
2. To select a customer, enter an account number in the Customer field
Note: If the account number is unknown, search for a customer by Last Name, First Name or email address using the Customer Lookup  icon.
icon.
3. After the account number is selected, determine in which option to proceed
Options:
Customer exists, all information is accurate – Proceed to Step 4.
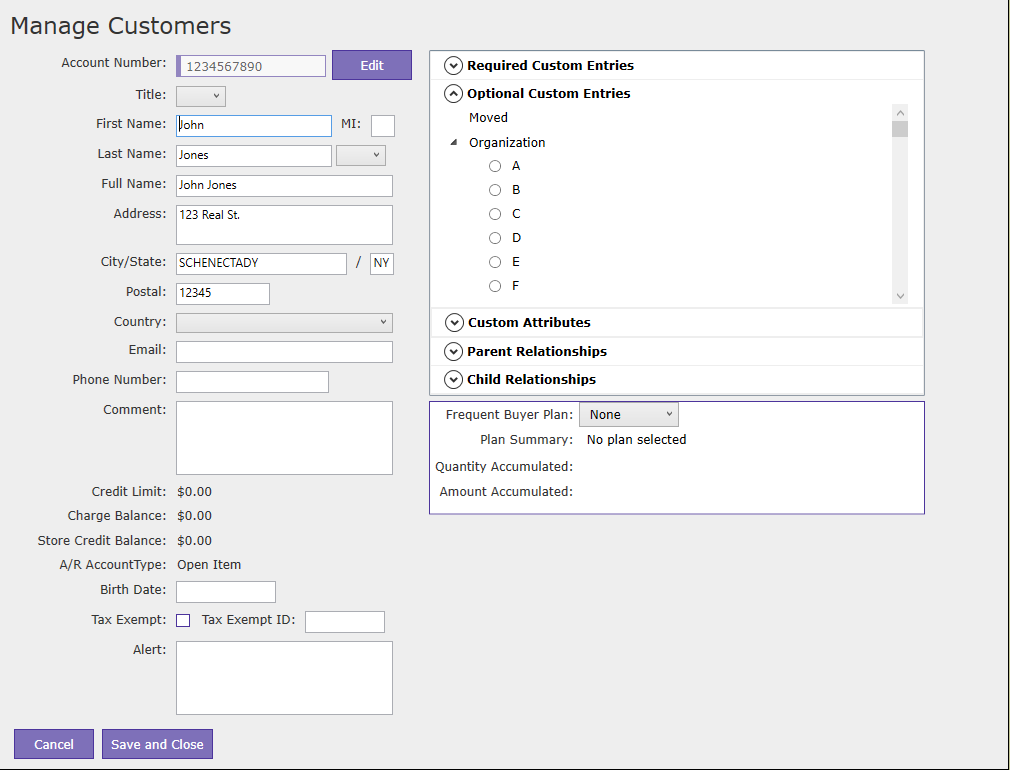
Customer exists, information is inaccurate – Click Customer Management and edit the necessary fields in the Manage Customer screen. Click Save and Close, when all edits have been completed to return to the Ticket Header screen. Proceed to Step 4.
Customer does not exist, is interested in being added to the RICS Back Office and RICS POS – Click Yes when prompted to add the customer. The Manage Customer screen will display, allowing the user to enter all the necessary and available information. Click Save and Close when all information is entered to return the Ticket Header screen. Proceed to Step 4.
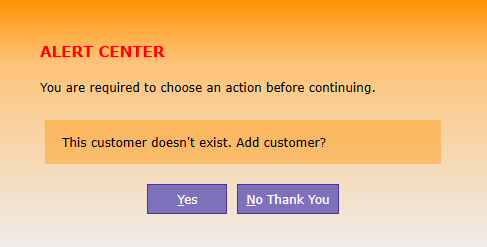
Customer does not exist and does not wish to be added to the RICS Back Office and RICS POS – Click No Thank You when prompted and proceed to Step 4
Manage Customer Screen:
4. If necessary, use the Sale Type dropdown menu to select the appropriate sale type
Options:
Store Sale (Default) – Select for all standard transactions processed through the RICS POS.
Web Sale – Select for ecommerce transactions processed through the RICS POS.
Catalog Sale (Phone) – Select for phone transactions processed through the RICS POS.
Wholesale – Select for wholesale transactions processed through the RICS POS.
Note: The Sale Type option should only be modified if instructed by a manager and/or owner.
5. If necessary, use the Promotion Code dropdown menu to select a promotion code to tie to a ticket
6. If necessary, enter a discount percent in the Ticket Discount % field to be applied to all items, excluding Gift Cards
7. If available, select the Email Receipt checkbox to email a receipt to the customer’s email address
Note: Email Receipt checkbox will be available based on information entered in the Manage Customer screen. If Email Receipt is selected, the checkbox will remain selected for future purchases unless unselected at a later time.
8. If necessary, select the Print Gift Receipt checkbox
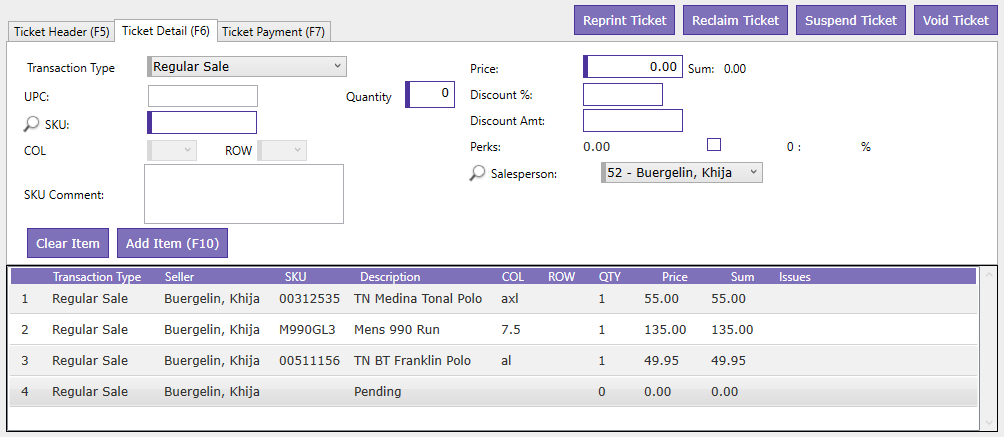
TICKET DETAIL TAB
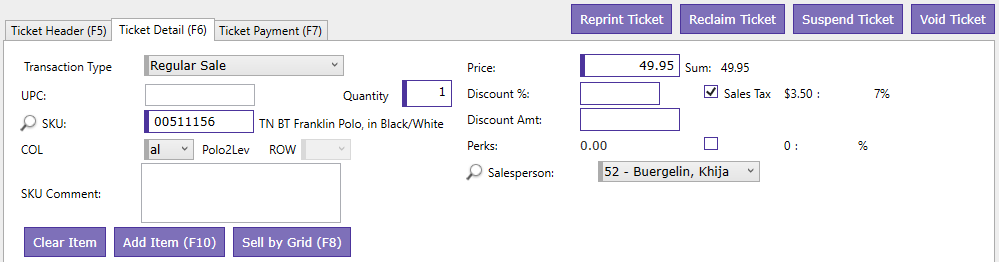
1. Use the Transaction Type dropdown menu to select how a transaction will be processed on the RICS POS
Note: To view all transaction types, including steps and descriptions, please reference Determine a Transaction Type.
2. After the transaction type is selected, determine in which option to add an item to a ticket
Options:
Scan/ Enter UPC – Scan or enter the UPC in the UPC field to add an item to the ticket. After the UPC is scanned or entered, the item information will display. If necessary, update the quantity being purchased in the Quantity field and/or proceed to Step 3.
Enter SKU – Enter the SKU in the SKU field to add an item to the ticket. After the SKU is entered, the user may be required to select a Col or Row value associated with the item to display the item information. If necessary, update the quantity being purchased in the Quantity field and/or proceed to Step 3.
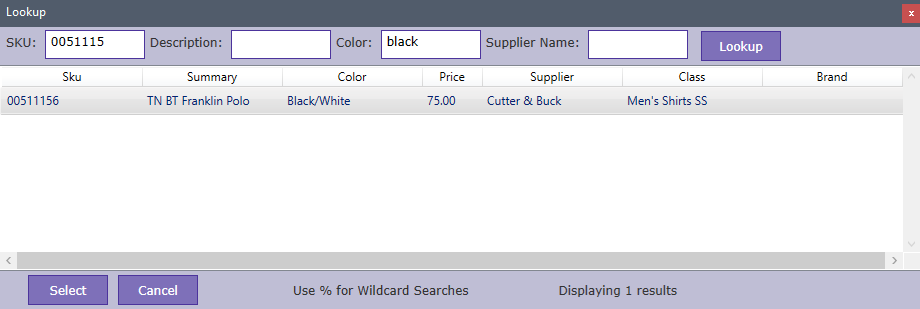
Search SKU – Search the SKU in the SKU field using the SKU Lookup  icon to add an item to the ticket. After the SKU is clicked, the user may be required to select a Col or Row value associated with the item to display the item information. If necessary, update the quantity being purchased in the Quantity field and/or proceed to Step 3.
SKU Lookup Screen:
3. If necessary, enter a comment in the SKU Comment field
Note: If a SKU comment is entered for an item the comment will print on the receipt just below the item.
4. If necessary, edit the price in the Price field
Note: To modify the price of an item, RICS recommends using the Discount % and Amount fields described in Step 5.
5. If necessary, enter a Discount % or Discount Amount in the corresponding field
Note: If a discount reason was created and set up in Setup :: Codes :: Manage Discount Reasons, use the Discount Reason dropdown menu to select the appropriate discount reason.
6. If necessary, unselect the Sales Tax checkbox to remove tax on an item being purchased
Note: Tax can be removed from an entire ticket by following Step 2 under Ticket Payment.
7. If necessary, use the Salesperson dropdown menu to select a salesperson
Note: The salesperson will default to the cashier selected in Step 1 of Ticket Header, but can be modified as needed for each item being processed through the RICS POS.
8. Click Add Item (F10)
9. To add additional items to a ticket, repeat Steps 1-8
Note: If multiple items are purchased, as items are added to a ticket the item will display in the Item List section on the Ticket Detail tab.
TICKET PAYMENT TAB
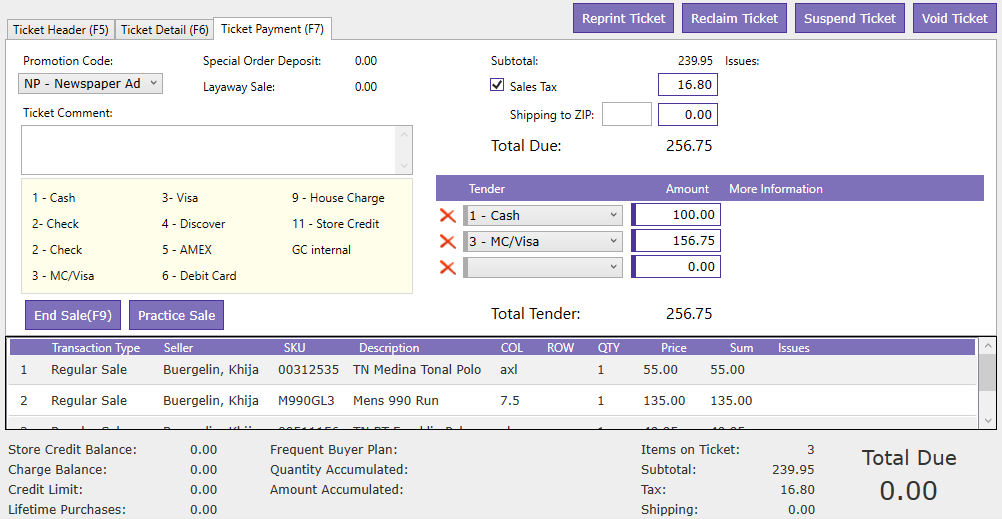
1. If necessary, enter a comment in the Ticket Comment field
Note: If a ticket comment is entered the comment will print on the receipt just above the Ticket Footer.
2. If necessary, unselect the Sales Tax checkbox to remove tax from the entire ticket
Note: Tax can be removed from an item on the ticket by following Step 6 under Ticket Detail.
3. If necessary, enter a zip code in the Shipping To Zip field to manually add shipping cost to a ticket
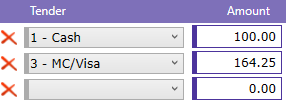
4. Use the Tender dropdown menu to select a tender to finalize payment
Note: A list of available tenders will display below the Ticket Comment section.
5. To add additional tenders, enter the payment amount for the first tender and repeat Steps 4-5 until Total Due is $0.00
6. Click End Sale (F9)
Comments